Take a new Tap Teams account from empty to capturing leads into your CRM.
This walkthrough assumes you’re a team admin setting up for the first time. Budget about 30 minutes. Do the steps in order — templates before members saves rework, and CRM before your first event saves a manual import.
Sign in to Tap Teams
Go to teams.gettap.co and sign in with email or LinkedIn.First time in, you’ll be walked through onboarding: company name, logo, industry, and team size. These feed the default template, so it’s worth filling in properly rather than skipping.
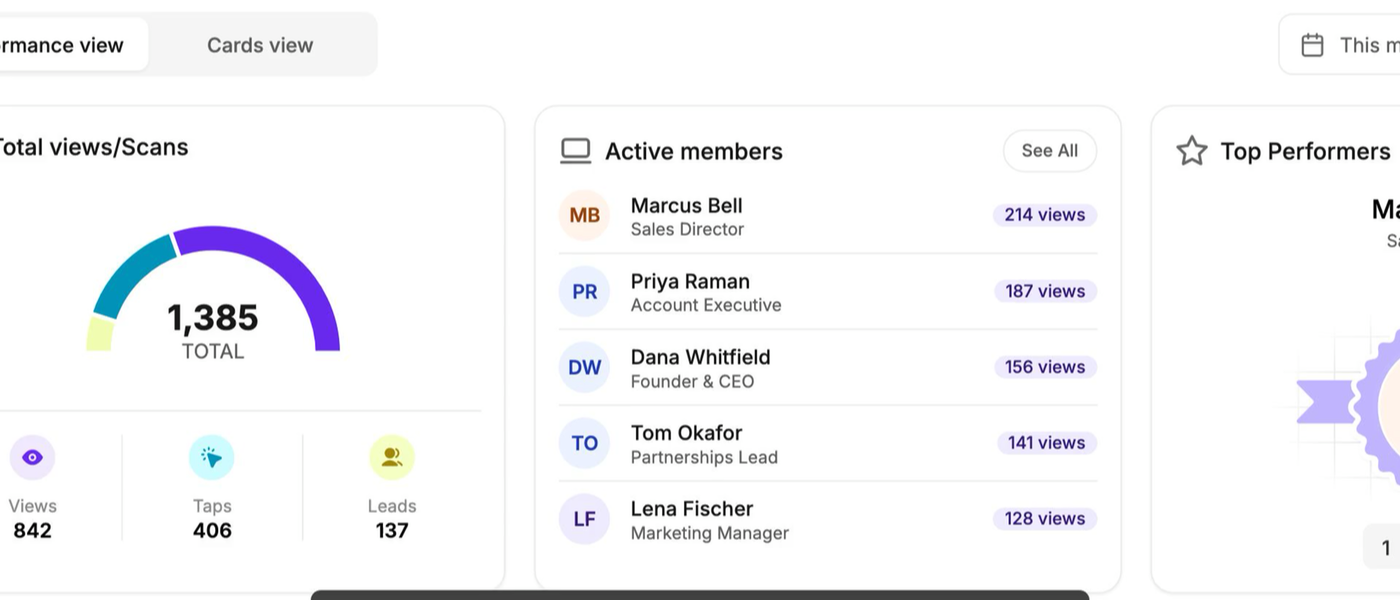
The Tap Teams home dashboard once you're set up
Build a template
Go to Templates → Create.A template fixes how every member’s profile looks — cover image, brand colors, layout, and a starting set of links. Publishing one before you invite anyone means new members get a correct profile the moment they join, instead of building their own and drifting from your brand.Add the links every member should have: company website, LinkedIn, a “book a meeting” link. Leave personal fields like direct phone empty for members to fill in themselves.
Templates can also carry lead capture fields. If you set them here, they override each member’s own form — useful when you need every rep collecting exactly the same data.
Create departments
Go to Departments → Create.Even with a small team, create at least one department. Permissions hang off departments, so a team with everyone in a single ungrouped pool has no way to restrict anything later.
A new department starts with full access — no restrictions at all. Permissions only take effect once you explicitly save restriction rules. Creating a department does not lock anything down by itself.
Go to Members → Create for one person, or use CSV import for a whole team at once.For each member set their department and the template their profile should use. Members receive an invitation email and complete their own profile in the mobile app.Importing a file? See Bulk import for the column format and how to read the import status screen.
Design your lead capture form
Go to Settings → Lead capture.Out of the box the form collects four fields in this order: full name, email, mobile phone, and a note. Add fields for what you actually need to qualify — company size, product interest, event name.
Keep it short. Every field you add is a field a stranger has to fill in while standing at your booth. Four to six is usually the ceiling.
See Lead capture forms for field types and the label-vs-name distinction that governs CRM mapping.
Connect your CRM
Go to Integrations and pick your CRM — HubSpot, Salesforce, Zoho, Pipedrive, or Veeva Vault.You’ll authorize Tap through your CRM’s own login, then map your capture fields to CRM fields. Do this before your first event: leads captured before a CRM is connected stay in Tap and need a manual export later.See Integrations overview.
Run a test capture
Don’t let an event be the first real test.Have one member open the app, share their profile to your own phone, and fill in the form as a visitor would. Then check three things in order: the lead appears under Leads, the fields landed in the right columns, and the record appears in your CRM under the right owner.If the record reached Tap but not the CRM, go to Integration troubleshooting.